Chrome Extension
Contents
Overview
The Store Leads Chrome Extension shows detailed information from the Store Leads database for any ecommerce store that you visit. It also works when looking at the social media account for any of the brands in our database. You can even hook up your CRM (Salesforce, HubSpot, etc.) to see your CRM information for ecommerce sites as you browse.
Note that a paid account is required to use all the features of the Chrome Extension. If you're using a free account, you'll only see a limited subset of features.
Installing the Chrome Extension
You may install the Chrome extension through the Store Leads Chrome Extension page on the Chrome Web Store.
Once the Chrome Extension is installed, you can access it through the Extensions section (in the upper right corder of the Chrome browser bar).
If you're currently browsing a site that is in the Store Leads database, the Store Leads logo will appear in color. If the current site is not in the Store Leads database, the logo will be grayed out.
To access the extension, simply click on the Store Leads icon. You can also open (and close) the extension by hitting Ctrl+Shift+L (or Command+Shift+L if you're on a Mac).
Store Details Tab
When you access the extension, you'll see details for the website that you're currently browsing in the Details tab.
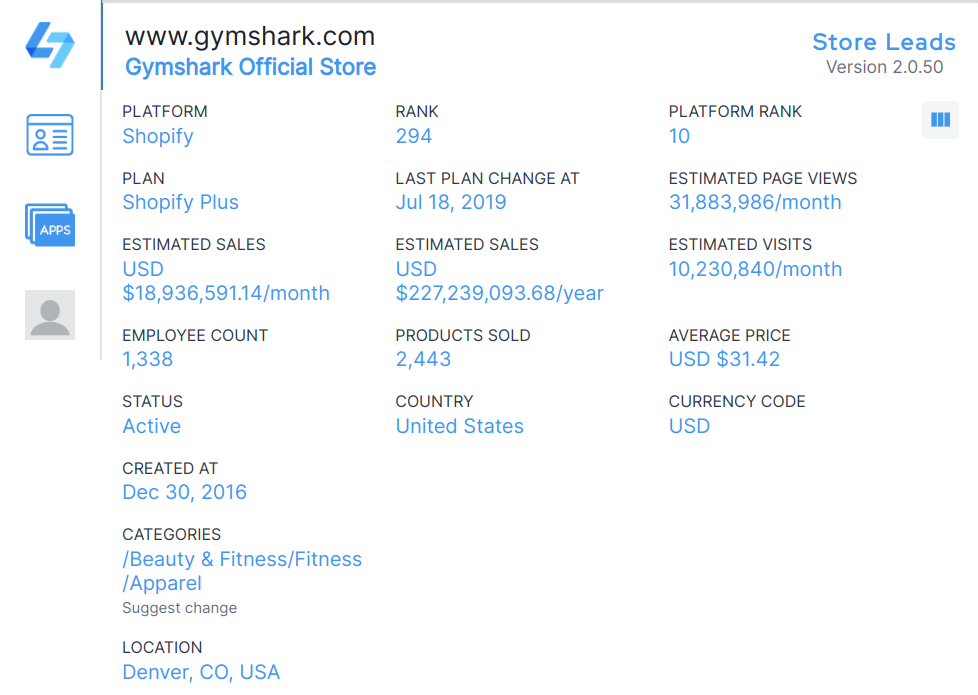
If you navigate away from the details tab, you can return to it by clicking on the Store Leads icon in the top-left corner of the extension window. The icons below the Store Leads logo can be used to access other parts of the extension. You can also use the number keys on your keyboard to quickly switch between the tabs within the extension.
Customizing Attributes
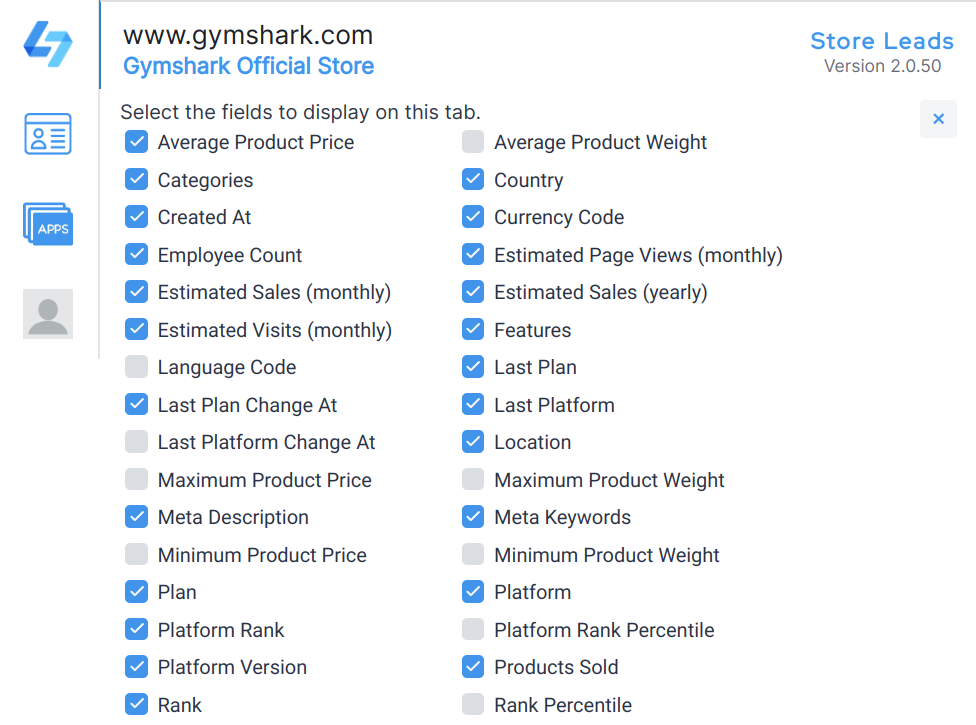
To customize the list of attributes displayed for a store, click on the Customize button in top right corner of the Store Details tab.

This will reveal a setting page that lets you choose the attributes to display for each store. Close the setting page by clicking on the X button.
Add to List
To add a store to a list, click on the menu button in the top right corner of the chrome extension.

In the menu, select Add to List. You'll then be able to add the store to an existing list or a new list.
Remove from List
To remove a store from a list, click on the menu button in the top right corner of the chrome extension.

In the menu, select Remove from List. You'll then be able to add the store to an existing list or a new list.
Contact Info Tab
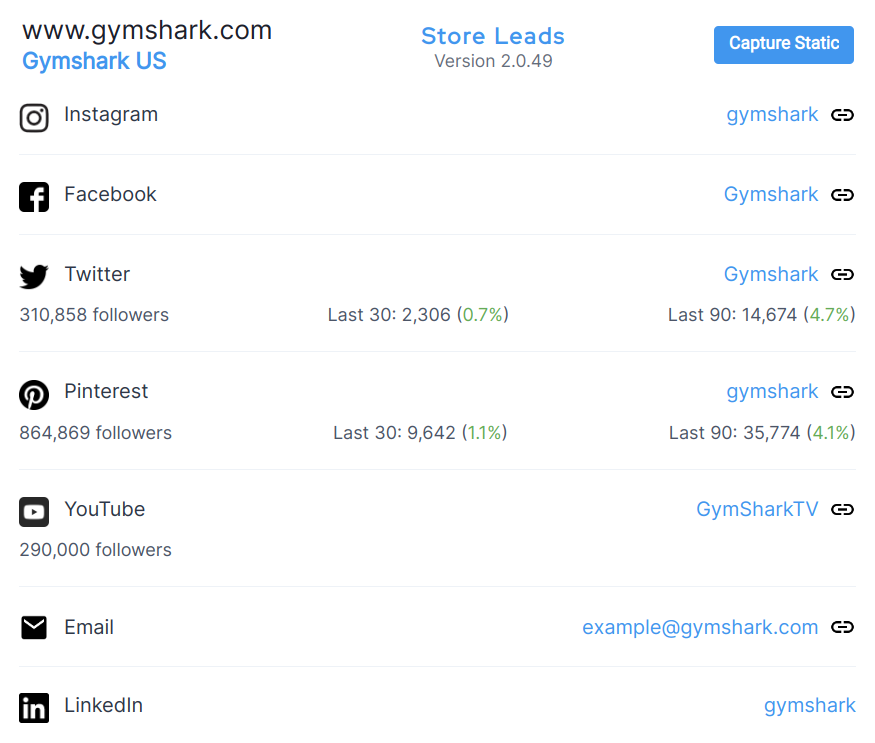
Click on the second icon to access the Contact Info tab. On this tab, you'll see the same contact info found on storeleads.app: social media accounts, email addresses and phone numbers.
Live Scan for Contact Info
If you're visiting a website that is not in the Store Leads database, you may still find it useful to see contact info for the site. This is helpful when reviewing a site that is not yet in our database (which may happen for new sites since our database is updated weekly) or when prospecting outside of the ecommerce website.
For customers on paid plans, the Chrome Extension will automatically do a live scan for contact information on any website that is not in the Store Leads database.

A corner case occurs when visiting a website that is not in the Store Leads database, but we have a website that has the same subdomain in our database. For instance, washingtonpost.com is not in our database but store.washingtonpost.com is. When visiting washingtonpost.com, the Chrome Extension automatically shows information for store.washingtonpost.com. If you really want to scan washingtonpost.com for contact information, you'll be given the open to do so by clicking the Live Scan button.

Apps and Technologies Tab
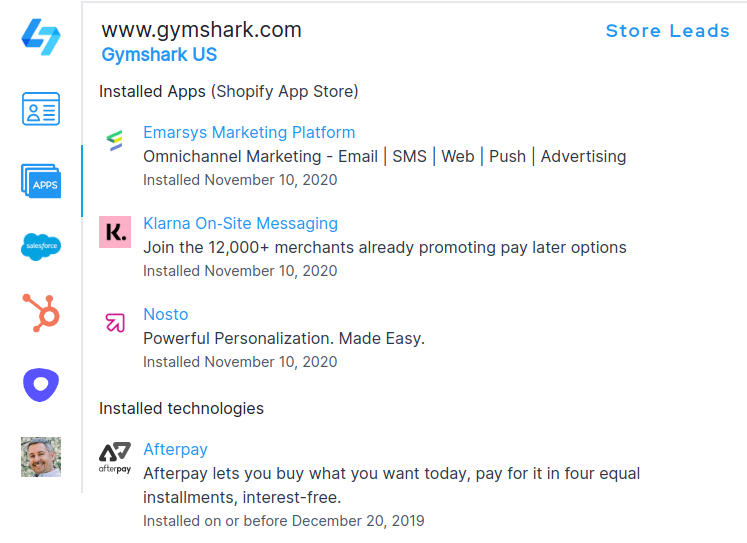
This tab shows the apps and technologies installed on the store's website.
Live Scan for Apps and Technologies
If you're visiting a website that is not in the Store Leads database, you may still find it useful to see the apps and technologies running on the site. This is helpful when reviewing a site that is not yet in our database (which may happen for new sites since our database is updated weekly) or when prospecting outside of the ecommerce website.
For customers on paid plans, the Chrome Extension will automatically do a live scan for apps and technologies on any website that is not in the Store Leads database.
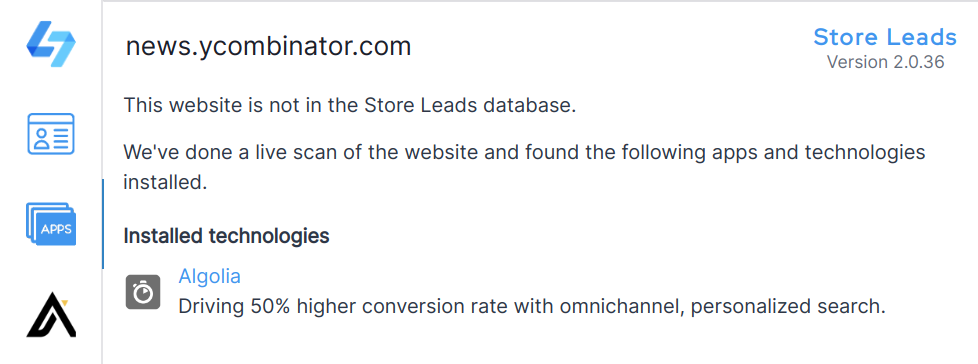
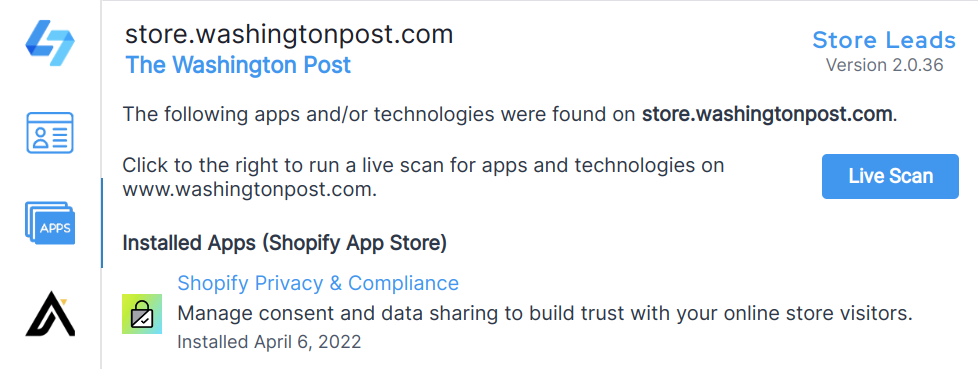
A corner case occurs when visiting a website that is not in the Store Leads database, but we have a website that has the same subdomain in our database. For instance, washingtonpost.com is not in our database but store.washingtonpost.com is. When visiting washingtonpost.com, the Chrome Extension automatically shows information for store.washingtonpost.com. If you really want to scan washingtonpost.com for apps and technologies, you'll be given the open to do so by clicking the Live Scan button.
Apollo.io Tab
If you have enabled the Apollo.io integration, you'll have access to the Apollo.io tab in Chrome Extension. This tab shows contact information from Apollo.io associated with the site that you're currently browsing.
The Apollo.io integration allows you to see a list of people working at each store (assuming Apollo.io has data for that store). You can also save people as Apollo.io contacts and add them to sequences.
Viewing People Working At a Store
Simply click on the Apollo tab to see the list of people working at each store. Data is retrieved from Apollo.io in real-time.
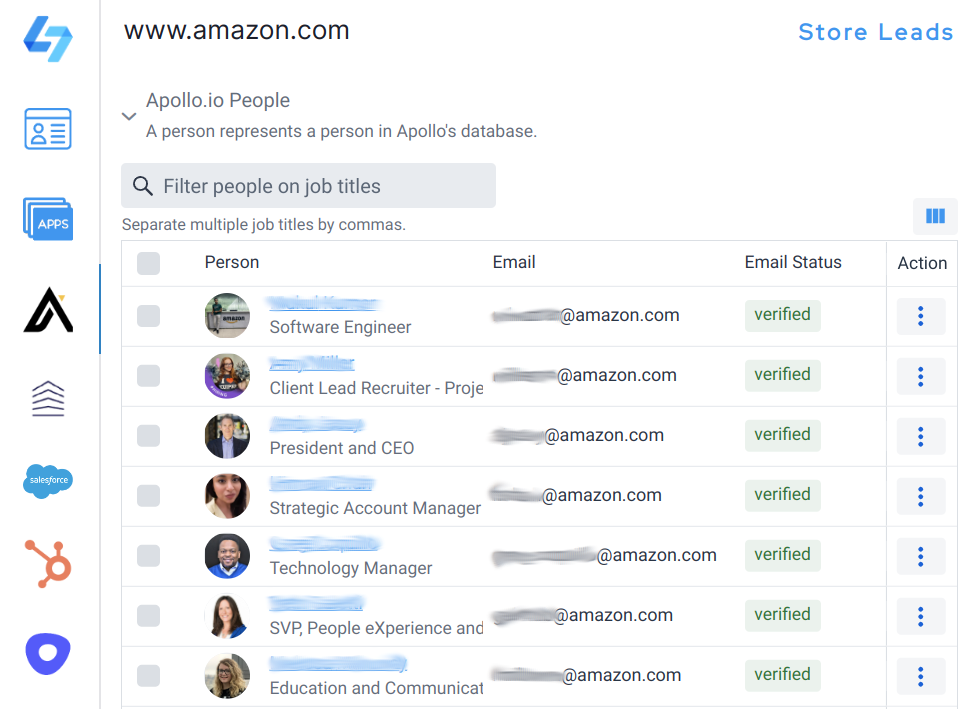
Note that there are 2 sections: people and contacts. A person represents a person working at the company from the Apollo.io database. People can also be saved to Contacts within Apollo.io. This is done to bookmark the person for later reference or to use Apollo.io's sequencing features.
By default, we show the list of people for a store but the list of contacts is hidden. To reveal the list of contacts, click the icon to the left of the "Apollo.io Contats" section. Separate API calls are require to retrieve the lists of people and contacts. Apollo.io can have fairly aggressive rate limits, so we save API calls by hiding the list of contacts unless you need it.
Customizing Columns
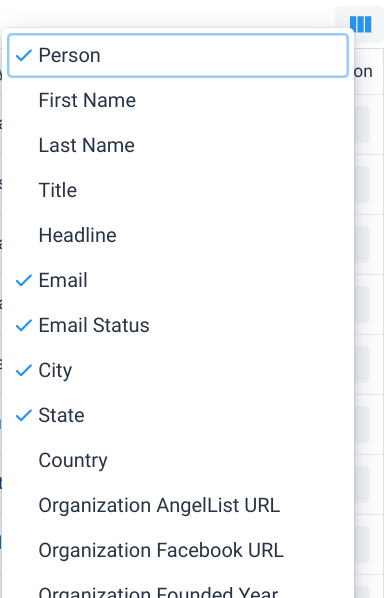
To customize the columns displayed for each person, click on the Column icon on top right corner of the person list.

This will reveal a menu that lets you choose which columns to display for each person.
Creating Apollo.io Contacts
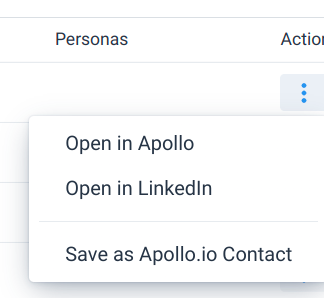
To save a person as an Apollo.io contact, click on the Action menu for the person and select "Save as Apollo.io Contact".
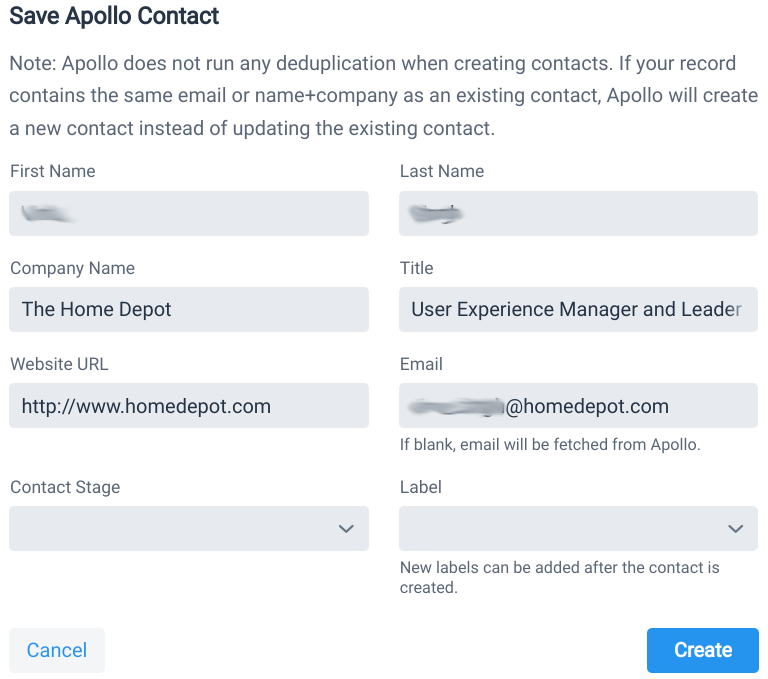
This will reveal the "Save Apollo Contact" form which can be used to customize contact details including contact stage and labels. All information is prefilled from data fetched from Apollo.io. Once you're done customizing the information, click the "Create" button to save the contact.
After the contact is created, you'll need to open the "Apollo.io Contacts" section to see it.
Bulk Apollo.io Contact Creation
To create multiple Apollo.io contacts at a time, start by selecting multiple people that you'd like to save as contacts.
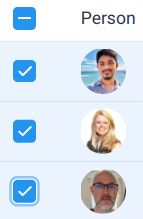
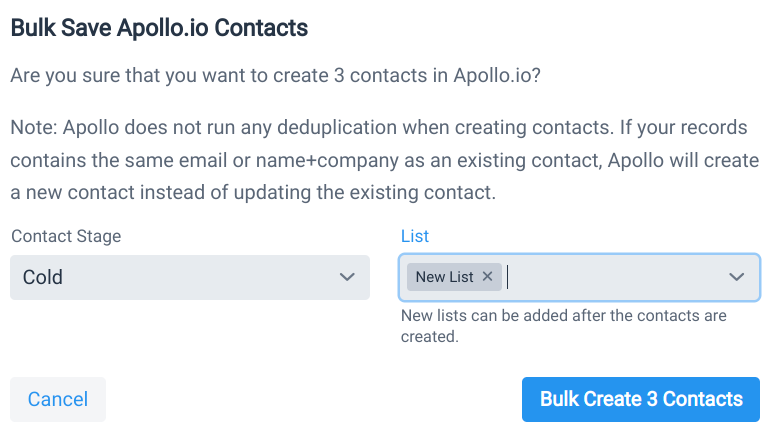
This will reveal a Save as Apollo.io Contacts button in the upper right corner of the person list. Click that button to see the bulk creation confirmation screen, which also allows you to configure stages and lists for the new contacts.
Viewing Contacts For a Store
Open the "Apollo.io Contacts" section to see the list of Apollo.io contacts for each store.
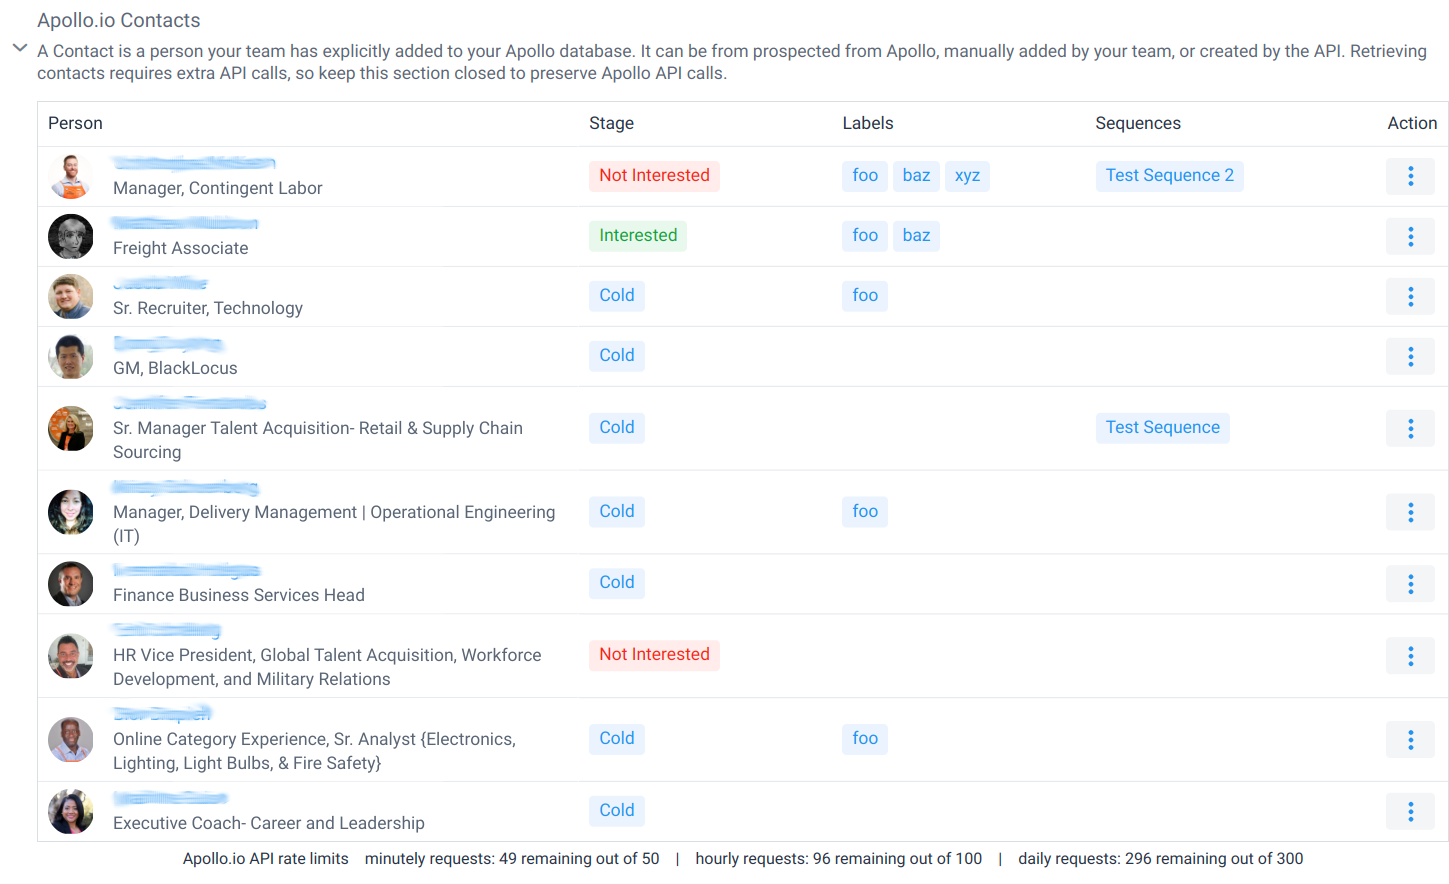
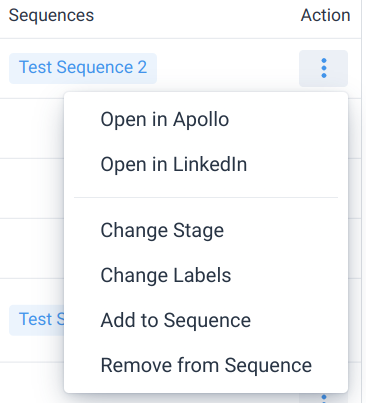
For each contact, you'll see the list stage assigned to the contact and a of labels and sequences to which the contact is assigned (if any). To change the stage, labels or sequences, click on the Action menu for the contact.
Customizing Columns
To customize the columns displayed for each contact, click on the Column icon on top right corner of the contact list.

This will reveal a menu that lets you choose which columns to display for each contact.

Bulk Add to Sequence
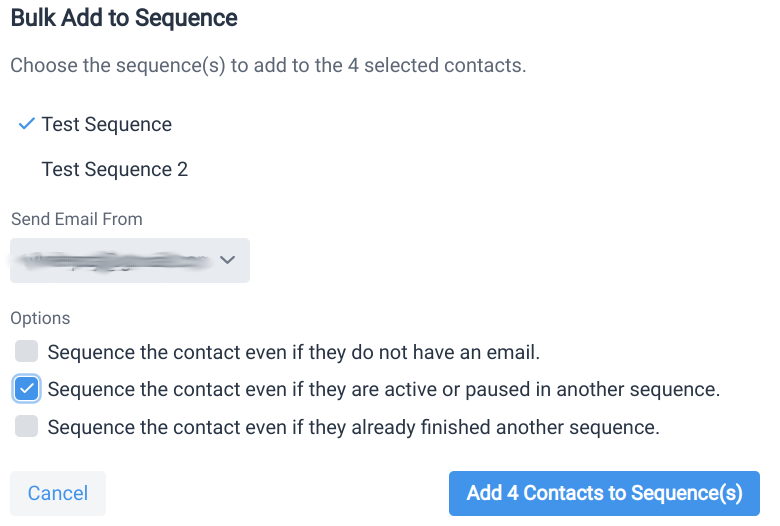
To assign multiple contacts to a sequence, start by selecting multiple contacts.

This will reveal an Add to Sequence button in the upper right corner of the contact list. Click that button to see the "bulk add to sequence" confirmation screen, which also allows you to configure the desired sequences and relevant options.
Cognism
If you have enabled the Cognism integration, you'll have access to the Cognism tab in Chrome Extension. This tab shows contact information from Cognism associated with the site that you're currently browsing.
Viewing Contacts Working At a Store
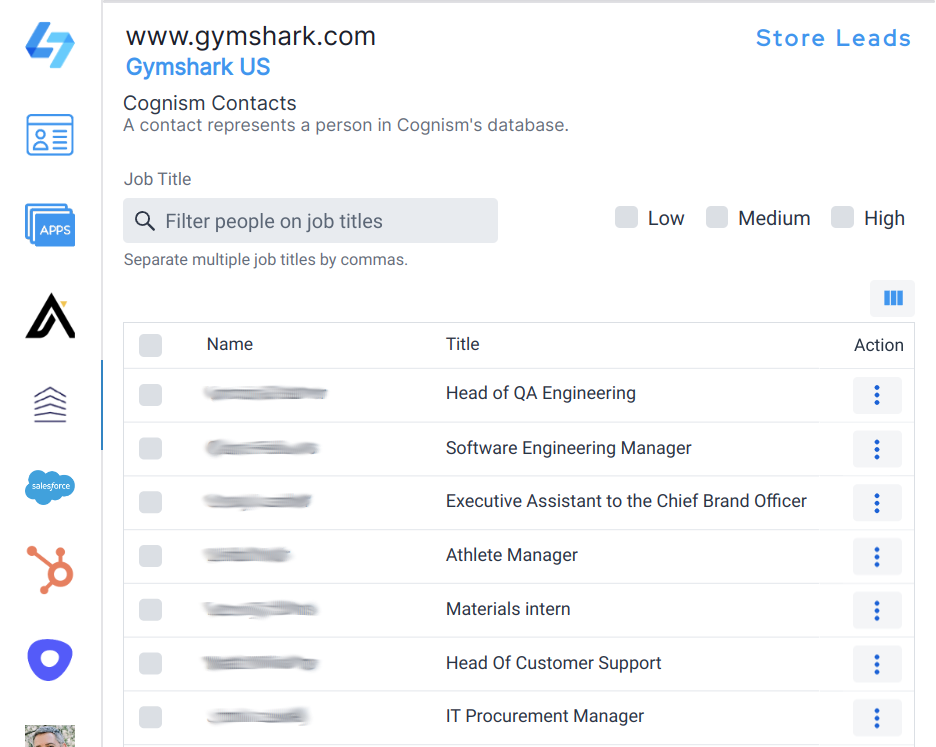
With the Cognism integration enabled, a new "Cognism" tab is available on the Chrome Extension. Click on this tab to see the list of contacts working at each store. Data is retrieved from Cognism in real-time.
Customizing Columns
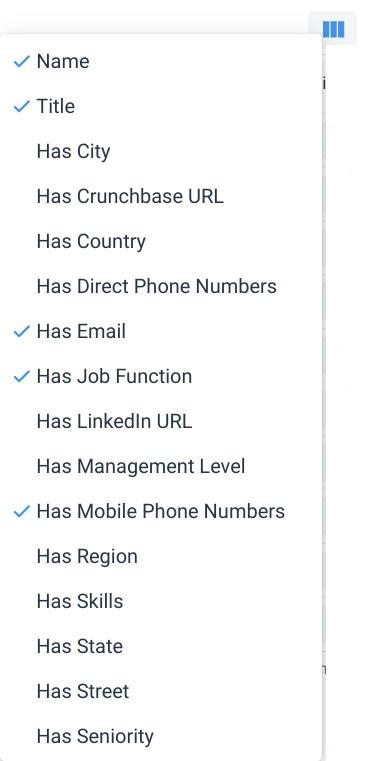
To customize the columns displayed for each person, click on the Column icon on top right corner of the person list.

This will reveal a menu that lets you choose which columns to display for each person.
ContactOut
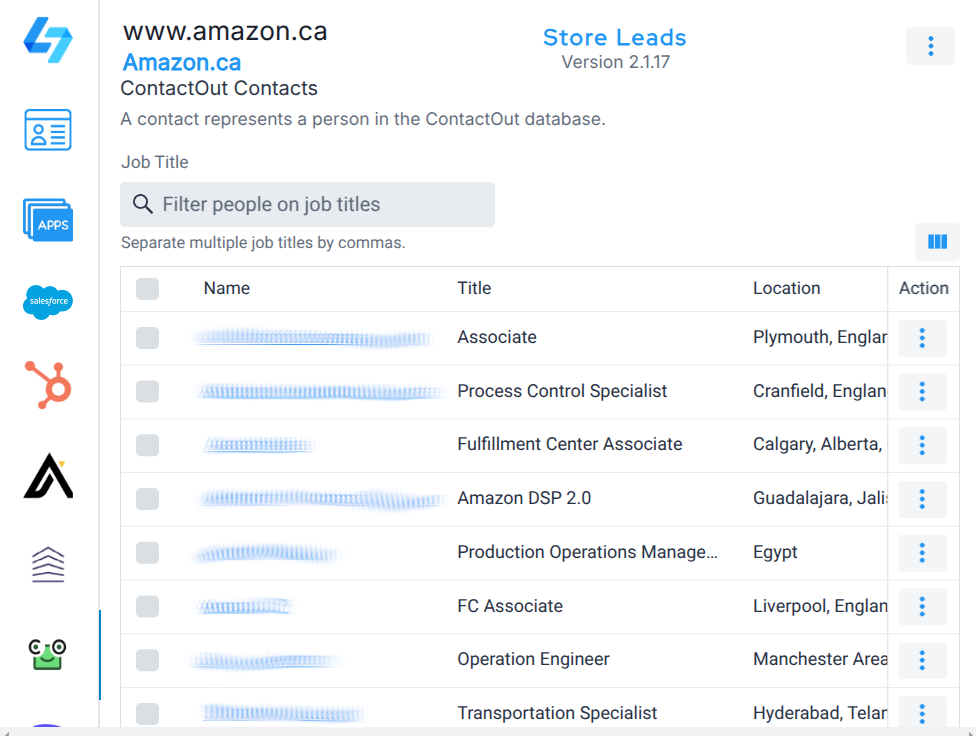
If you have enabled the ContactOut integration, you'll have access to the ContactOut tab in Chrome Extension. This tab shows contact information from ContactOut associated with the site that you're currently browsing.
Viewing Contacts Working At a Store
With the ContactOut integration enabled, a new "ContactOut" tab is available on the Chrome Extension. Click on this tab to see the list of contacts working at each store. Data is retrieved from ContactOut in real-time.
Customizing Columns
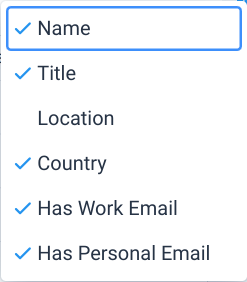
To customize the columns displayed for each person, click on the Column icon on top right corner of the person list.

This will reveal a menu that lets you choose which columns to display for each person.
HubSpot Tab
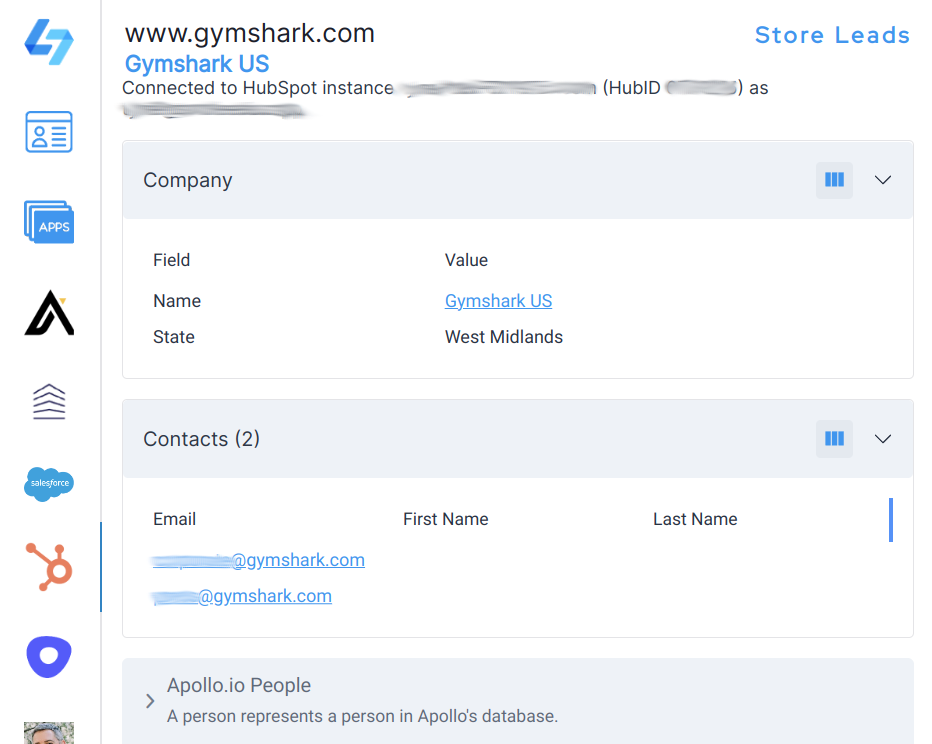
If you have enabled the HubSpot integration, you'll have access to the HubSpot tab in Chrome Extension. This tab shows all Company and Contact information associated with the site that you're currently browsing.
Customizing Data Shown From HubSpot
Information displayed in this tab is retrieved directly from your HubSpot instance. The exact information displayed for Company and Contacts can be customized by clicking the column icon.

If the website that you're currently browsing is in the Store Leads database but is not linked to a HubSpot account, then you'll be given the option to create a new HubSpot Company with a single click.
Finally, if you have one of our personal data vendor integrations enabled (such as Apollo.io), then you'll also have the option to create HubSpot contacts from data from the personal data vendor.
Outreach Tab
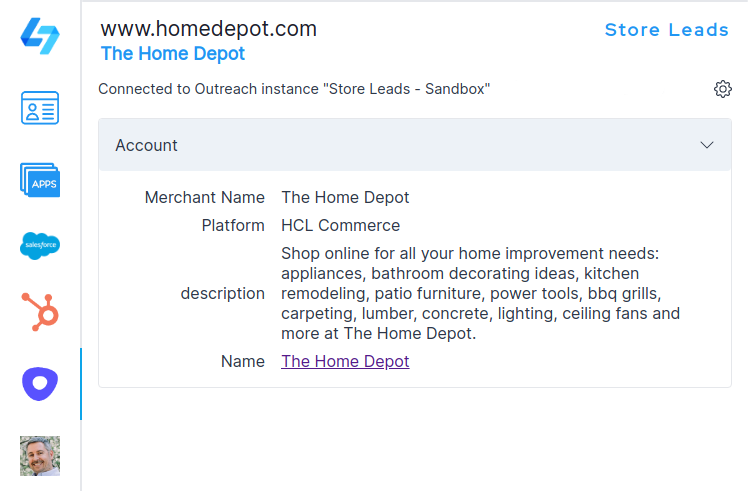
If you have enabled the Outreach integration, you'll have access to the Outreach tab in Chrome Extension. This tab shows all Account information associated with the site that you're currently browsing.
Customizing Data Shown From Outreach
Information displayed in this tab is retrieved directly from your Outreach instance. The exact information displayed for the Outreach Account can be customized by clicking the gear icon.

If the website that you're currently browsing is in the Store Leads database but is not linked to a Outreach Account, then you'll be given the option to create a new Outreach Account with a single click.
Salesforce Tab
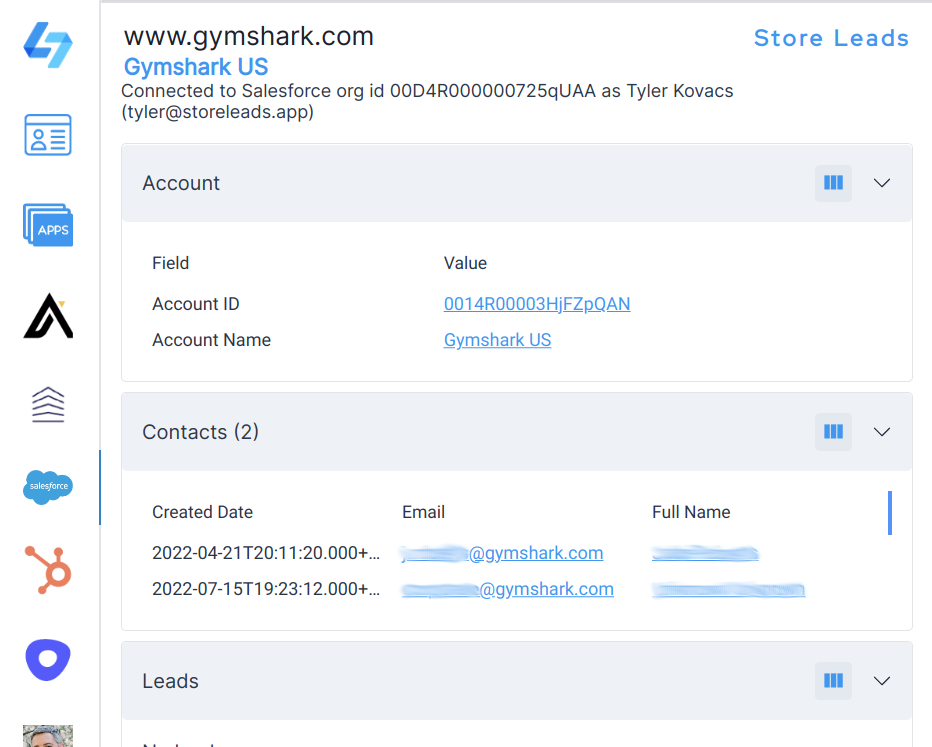
If you have enabled the Salesforce integration, you'll have access to the Salesforce tab in Chrome Extension. This tab shows all Account, Contact and Lead information associated with the site that you're currently browsing.
Customizing Data Shown From Salesforce
Information displayed in this tab is retrieved directly from your Salesforce instance. The exact information displayed for Accounts, Contacts and Leads can be customized by clicking the column icon.

If the website that you're currently browsing is in the Store Leads database but is not linked to a Salesforce Account, then you'll be given the option to create a new Salesforce Account with a single click.
Finally, if you have one of our personal data vendor integrations enabled (such as Apollo.io), then you'll also have the option to create HubSpot contacts from data from the personal data vendor.
 Store Leads